Generating ViewModels In Xamarin.Forms With The MVVM Wizard
Use MFractors MVVM Wizard to create new XAML Views, Code-Behind and ViewModels for Xamarin.Forms in a few clicks.
When building iOS and Android apps with Xamarin.Forms, it's common to follow the Model-View-ViewModel pattern when structuring our code-base. We typically create a XAML page and then a ViewModel for that page, using data-binding to connect properties on our view model to our controls.
However, when we create a new page and it's corresponding ViewModel, it can be a lot of work! We need to go through the New File wizard twice to create our Page and ViewModel, ensure they are named consistently, use the right base classes and are placed in the correct folders. All in all, this process involves a lot of clicks and a heck of a lot of typing.
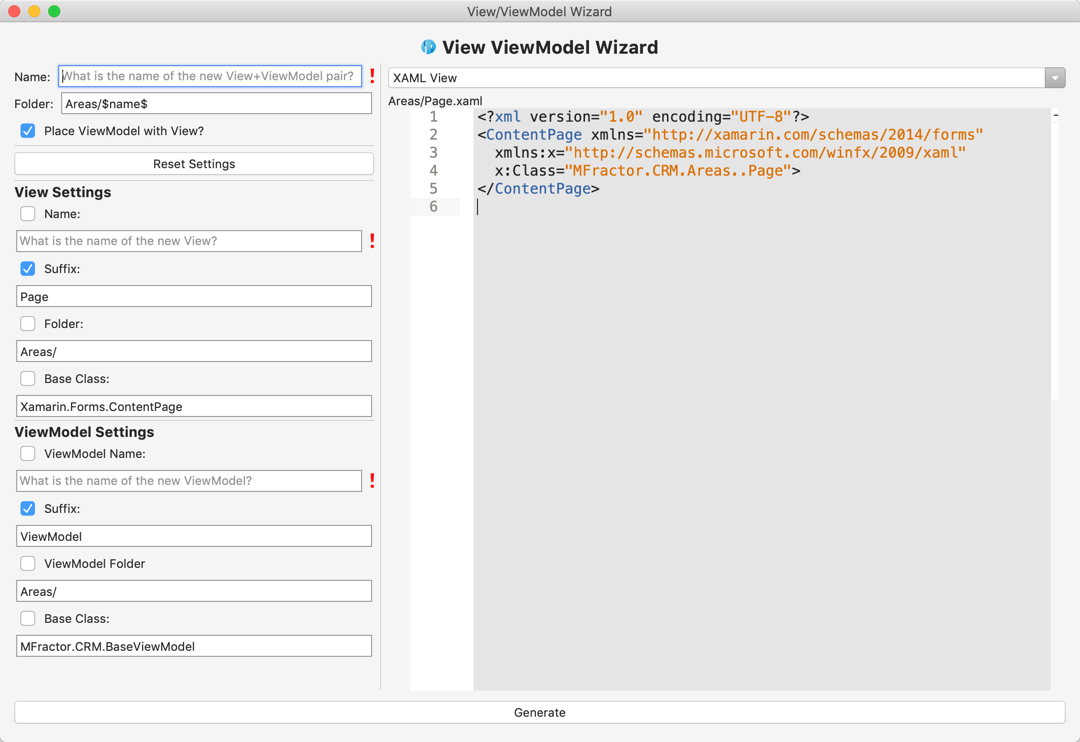
To streamline the process of creating new pages and their ViewModel, MFractor includes the MVVM Wizard; a handy tool for creating a XAML view, code behind and ViewModel in one step.
Accessing The MVVM Wizard
When are working within a code file in a project that references Xamarin.Forms, the MVVM Wizard can be launched through the following methods:
The Project Pad
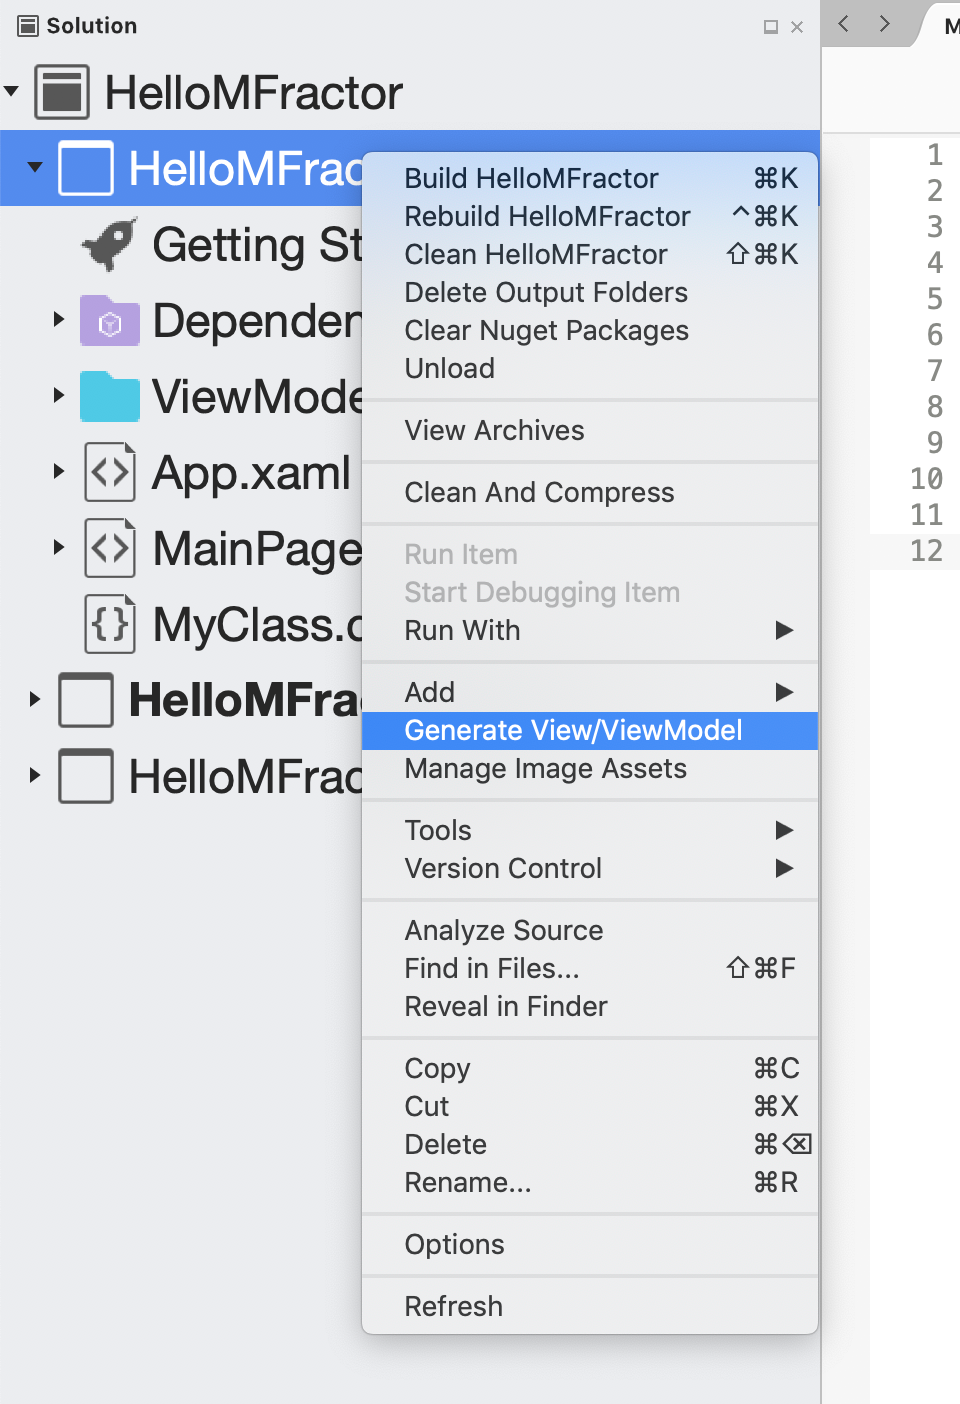
Right-click on a project or any of its folders and select Generate View/ViewModel
The MFractor Menu
Go to the top menu bar and under the MFractor menu, choose Generate View/ViewModel.

Lastly, we can also press Command+Shift+M from any code file to launch the wizard.
Using the MVVM wizard
Let's go through the various UI elements of the MVVM Wizard and what they do:
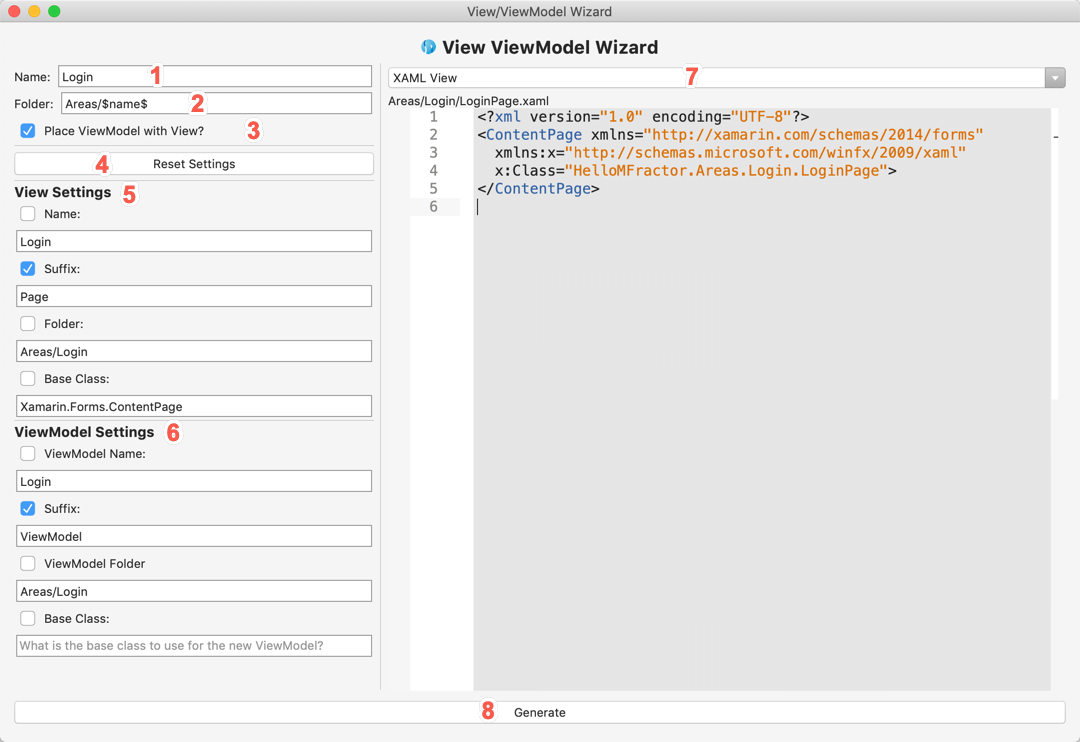
- The Name of the new View and ViewModel that we want to create. This is the name without the Page or ViewModel suffix applied to it.
- The Folder path, relative to our project, where we want to place our Views and, optionally, our ViewModels. You can enter
$name$as part of the folder path to make it inject the Name value into the new folder. If these folders do not exist, MFractor will create them. - If ViewModels should be placed along side the XAML View.
- Resets all any custom entered View and ViewModel settings
- Custom settings for the generated view. For example, the desired name of the view, the suffix to add to the name, the folder to place it within and the default base class of the view.
- Custom settings for the generated ViewModel, For example, the desired name of the ViewModel, the suffix to add to the name field, the folder where the view model should be placed and the default base class for the new ViewModel.
- The file to preview. You can choose between the XAML View, it's code behind and the ViewModel here.
- The Generate button generates the new XAML file, it's code behind and view model, placing them into the current project.
As you enter values into the Name, Folder and other fields, you will see the preview panel on the right side of the editor update, showing you what the generated code will look like.
When using the MVVM Wizard, I find it's best to set up a project configuration (described below) and then simply type out the name of the new feature. MFractor will then figure out where to place the new files and what to name them based on your preferences. This makes it very easy to open the MVVM Wizard, type out a name and then click Generate to create the necessary shellcode for that page.
Configuring The MVVM Wizard
Out of the box, the MVVM Wizard is already a powerful tool that streamlines the creation of pages and their ViewModels. However, each time we use the Wizard we probably need to re-enter settings like the target folder, the ViewModel base class or if the ViewModel should be placed with the XAML view.
This is not ideal and somewhat detracts from the potential productivity improvements that the MVVM Wizard provides.
To fix this, the MVVM Wizard leverages MFractor's configuration infrastructure so that you can fine tune it to follow your projects conventions.
To get started, create a new file in the root of your project named app.mfc.xml ; this is an MFractor configuration file.
Let's start by configuring the MVVM Wizard to use a custom base class for all new ViewModels:
app.mfc.xml
<?xml version="1.0" encoding="UTF-8" ?>
<mfractor>
   <configure id="com.mfractor.code_actions.xaml.implement_view_model">
       <property name="BaseClass" value="HelloMFractor.BaseViewModel"/>
   </configure>
</mfractor>
This configuration targets the com.mfractor.code_actions.xaml.implement_view_model configuration group and sets BaseClass to use HelloMFractor.BaseViewModel, the base class for all view models in our app.
Or, we could configure the MVVM Wizard place our ViewModels alongside our XAML pages, by setting ShouldPlaceViewModelWithView in com.mfractor.code_actions.xaml.implement_view_model to true:
app.mfc.xml
<?xml version="1.0" encoding="UTF-8" ?>
<mfractor>
   <configure id="com.mfractor.code_actions.xaml.implement_view_model">
       <property name="ShouldPlaceViewModelWithView" value="true"/>
   </configure>
</mfractor>
Finally, we can fine tune the MVVM Wizard to follow our coding conventions:
app.mfc.xml
<?xml version="1.0" encoding="UTF-8" ?>
<mfractor>
    <configure id="com.mfractor.code_actions.xaml.implement_view_model">
        <property name="BaseClass" value="HelloMFractor.BaseViewModel"/>
        <property name="ShouldPlaceViewModelWithView" value="true"/>
    </configure>
    <configure id="com.mfractor.code_gen.forms.view_and_view_model">
        <property name="DefaultFolderLocation" value="Areas/$name$"/>
    </configure>
</mfractor>
This configuration will:
- Make all new ViewModels use
HelloMFractor.BaseViewModelas their base class. - Always place view models along side the new XAML file.
- Place new views and view models into the folder path
Areas/$name$, where$name$is the value you enter into the name entry in the MVVM Wizard.
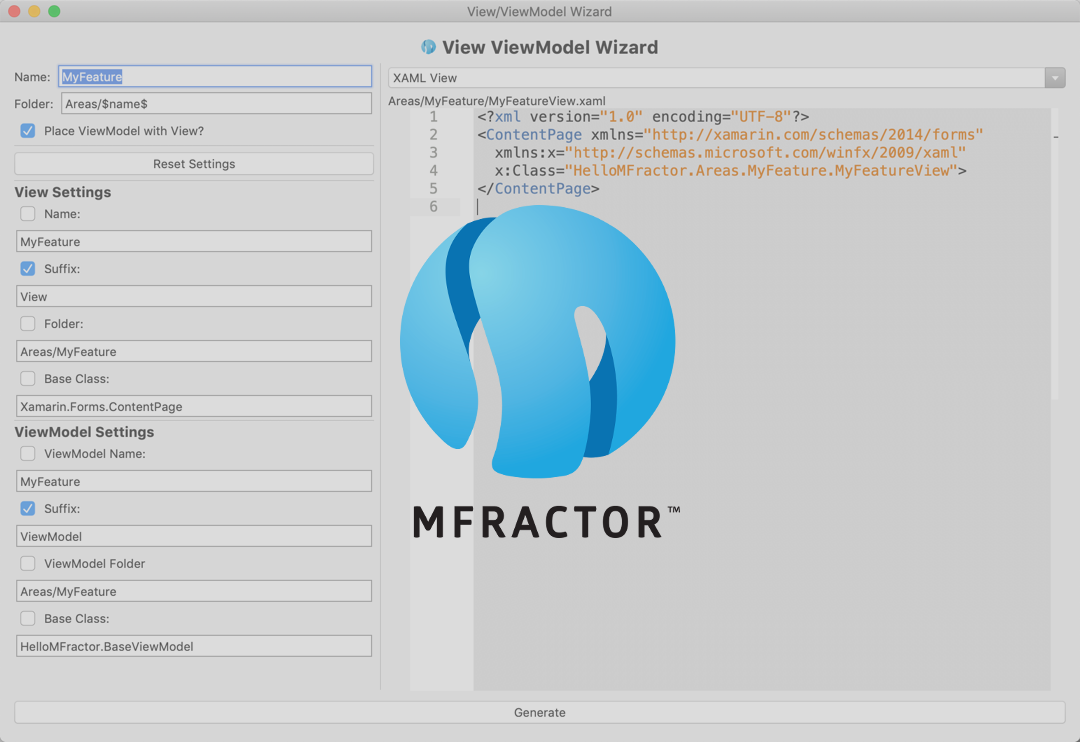
When we apply use this configuration our project, the MVVM Wizard will generate new XAML views and ViewModels that follow our projects conventions:
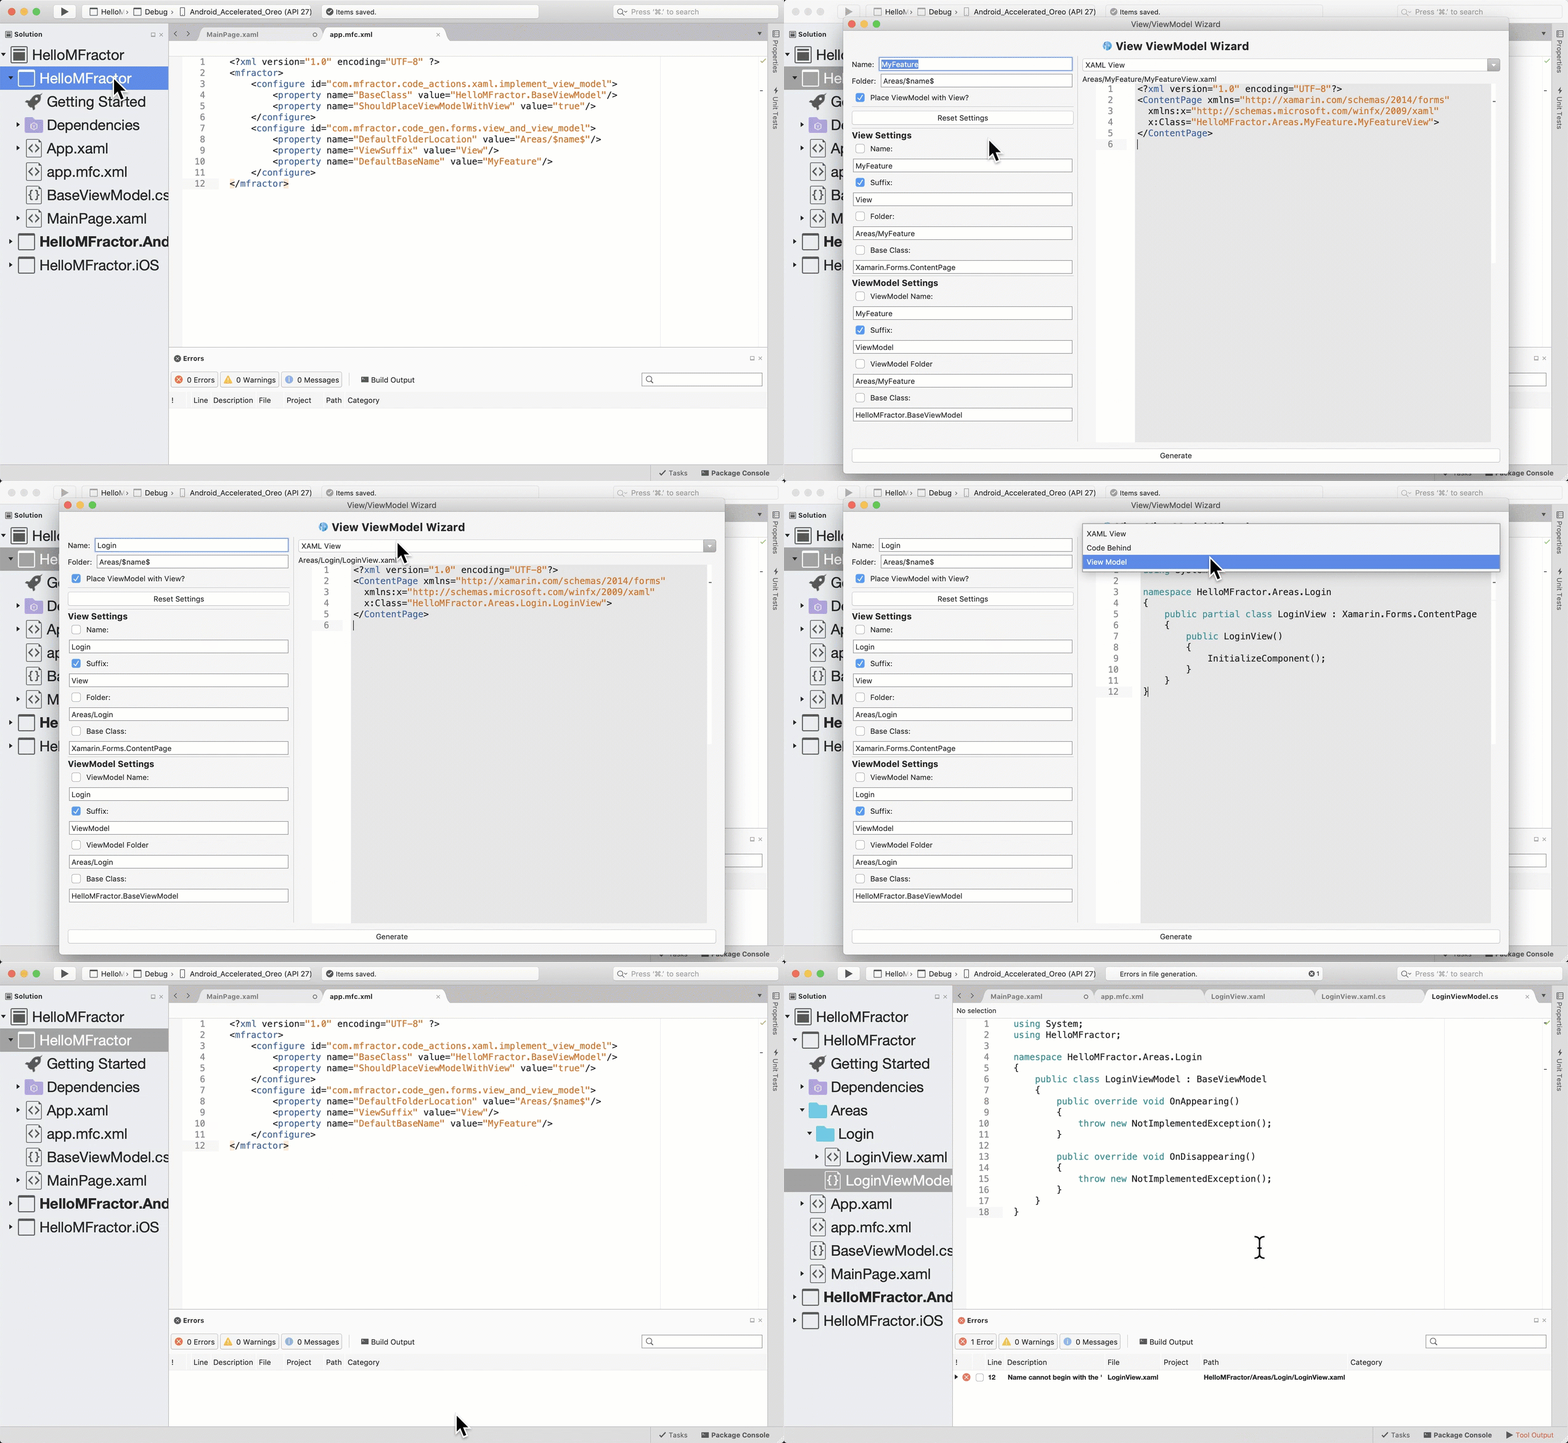
The MVVM Wizard also supports configuration of:
- The default view folder.
- The view suffix (defaults to
Page). - The default ViewModel folder (defaults to
ViewModels).
As configuring MFractor is still a little complex, I am absolutely happy to help you set it up. Please reach out to me via Twitter or email me at matthew@mfractor.com to book a call with me.
Summary
By using the MVVM Wizard to create new XAML views and ViewModels, we save a significant amount of time (and typing!) by no longer needing to create the code files separately. As well as making building your app a bit easier, over the course of a project this can save several hours worth of work!
The MVVM Wizard is only available in MFractor Professional. At $200AUD per user per year (less than a dollar a day), MFractor Professional and the MVVM Wizard speed is a very useful addition to your Xamarin toolbelt.
Want to try out MFractor Professional, email me at matthew@mfractor.com to request a trial.


